5 Curtain Measurement Mistakes You’re Probably Making and How to Fix Them
Curtains can make or break the aesthetics of a room. While they seem simple to install, getting the measurements wrong can leave you with a look that feels off or incomplete. Unfortunately, many homeowners overlook key details when measuring for curtains. Below, we’ll explore five common curtain measurement mistakes and provide practical advice to ensure flawless window treatments.
Table of Contents
Mistake 1: Placing the Curtain Rod Too Low
Why Does Rod Placement Matter?
Placing the curtain rod too low is a common oversight that can make even the most beautiful curtains look unflattering. When the rod is positioned just above the window frame, the room can feel smaller and less open. Curtains hung too low also draw attention to the ceiling height—or lack thereof—in a way that feels cramped.
For instance, imagine walking into a room with stunning floor-to-ceiling windows. Still, the curtain rod is installed just above the window frame. The effect? A window treatment that feels disproportionate and visually cuts the room short. You can find expert advice on curtain rod placement tips at House Beautiful, which will help avoid this common mistake.
How High Should You Hang Your Curtain Rod?
Place the curtain rod 6-12 inches above the top of the window frame or closer to the ceiling for dramatic effect to create an elevated and elegant look. This approach elongates the walls, making the room feel taller. Interior designers often call this the “ceiling trick,” and it’s particularly impactful in smaller rooms.
Consider your curtain style for a tailored result. Sheer panels may look best slightly below the ceiling, while heavier drapes can hang a few inches lower to maintain balance. For tips on selecting the ideal curtain style, check out How to Choose the Right Curtain Style for Every Room.
Mistake 2: Choosing Curtains That Are Too Short
Why Short Curtains Can Ruin the Look?
Curtains that are too short disrupt a room’s harmony. They often leave an awkward gap between the fabric and the floor, creating a “floating” effect that can cheapen the overall design. Curtains should ground a room, adding warmth and sophistication, but short ones tend to do the opposite.
A client once shared their experience of ordering pre-packaged curtains without checking the length. The result? The curtains stopped several inches above the floor, leaving their otherwise cozy living room unfinished.
The Right Way to Measure Curtain Length

Always measure from the top of the curtain rod to the floor to avoid this mistake. For a complete curtain length measurement guide, visit The Spruce’s detailed guide to ensure accuracy when choosing the right curtain length. Add a few extra inches if you want a “puddled” look, where the fabric pools on the floor for added elegance.
For standard styles, curtains should either “kiss” the floor or hover about ½ inch above it for a clean and modern look. If you’re unsure whether to go for sill or floor-length curtains, check out Sill vs. Floor-Length Curtains: Which One is Right for You? If you’re working with uneven floors, adjust the measurements accordingly to avoid an uneven hem.
Mistake 3: Selecting Curtains That Are Too Narrow
How to Calculate the Perfect Curtain Width?
Curtains that are too narrow leave windows looking incomplete and can limit functionality. Ideally, when open, curtains should extend beyond the sides of the window, creating a sense of balance and fullness.
To determine the correct width, measure the window’s width and multiply it by 1.5 to 2 times. For more detailed instructions on how to calculate curtain width, check out this guide from Better Homes & Gardens. For example, if your window is 48 inches wide, your curtains should have a combined width of 72 to 96 inches. This extra width ensures that the curtains can fully close without looking stretched. When open, it provides a luxurious, gathered effect.
Tips for Creating Fullness and Balance
Fullness is key to achieving a high-end look. If your curtains appear flat or stretched, they may need more width. Choose curtain panels that are wide enough to overlap slightly in the center when closed.
For a practical example, a client once opted for curtains that matched the exact width of their window, thinking it would save space. However, the result was a sparse, unfinished look that didn’t frame the window properly. The room immediately felt more balanced and inviting by upgrading to wider panels.
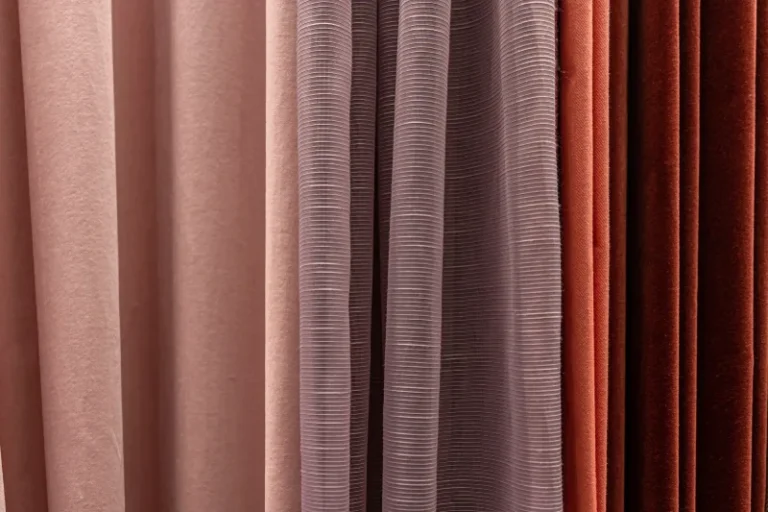
Mistake 4: Ignoring Fabric Functionality
Matching Fabric Choices to Your Space
Only some fabrics work for some rooms. For instance, heavy velvet drapes may look stunning in a formal living room but can overwhelm a small kitchen or bathroom. Consider the purpose of the space and the ambiance you want to create.
For high-traffic areas, choose durable and easy-to-clean materials like polyester blends. Light-blocking fabrics can enhance sleep quality in bedrooms, while sheer panels in living areas let in natural light and create an airy vibe.
Why You Should Consider Washability?
Many people need to remember to factor in the practicality of maintaining their curtains. Non-washable materials may look great initially but can become a hassle in homes with pets, kids, or heavy dust. Choosing washable fabrics makes cleaning easier and extends the life of your curtains.
A couple I worked with installed beautiful silk curtains in their dining room but were dismayed when spills and dust began to ruin the look. Switching to a washable linen blend improved the functionality and maintained a similar aesthetic.
Mistake 5: Skipping Precise Measurements
Common Measurement Errors to Avoid
One of the most significant errors is assuming all windows are standard sizes. Many homeowners guess measurements or rely on default curtain sizes without considering their windows’ unique dimensions. Another frequent issue is forgetting to account for the curtain rod’s position, which can alter the necessary length and width.
Easy Steps for Accurate Curtain Sizing
To measure correctly, start by determining the width of the window frame. Add at least 4-6 inches on each side for proper coverage. For length, measure from the rod to the desired endpoint—whether just above the floor, “kissing” the floor, or pooling slightly for a dramatic effect.
Use a metal tape measure for accuracy and take measurements twice to avoid mistakes. For a detailed guide on how to measure curtains correctly, Houzz provides expert advice that will help you get it right every time. Many clients find marking the measurements on painter’s tape directly on the wall helpful as a visual guide before purchasing curtains.
Final Tips for Perfect Curtains Every Time
Tools and Resources to Simplify the Process
Use tools like a metal tape measure, level, and Homechisel’s Curtain Lenght Size Calculator to make the process effortless. These tools can save time and ensure you get precise measurements.
Using Homechisel’s Curtain Size Calculator
Homechisel’s curtain size calculator is an invaluable resource for taking the guesswork out of measurements. Input your window dimensions, and it will provide you with the optimal curtain size for your space. For further guidance on curtain sizing, check out our Master Curtain Sizing: Your Ultimate Guide for Selecting Ideal Window Treatments. This ensures a perfect fit and saves you from common mistakes.
By steering clear of these common curtain measurement mistakes, you can upgrade your windows into a captivating focal point that enhances the ambiance of your entire room. With careful planning, accurate measurements, and the right tools, achieving a flawless curtain setup has never been easier. Take the guesswork out of the process and transform your space into one that exudes style and sophistication.
FAQs About Curtain Measurements
Curtains should ideally be 2-3 inches longer than the window to create a clean, polished look. Add 6-8 inches for a slight puddle effect for a more luxurious vibe.
It’s always better for curtains to be slightly too long than too short. Curtains that touch or puddle on the floor add elegance, while shorter curtains can make a room feel incomplete.
Yes, curtains should either lightly touch the floor or hover about ½ inch above it. This creates a professional, tailored appearance while making cleaning easier.
Discover Our Other Interior Design Articles

Budget-Friendly Renovation Ideas Using Only Lighting, Paint, and Flooring

Bedroom Renovation Ideas: Matching Floor Color, Paint, and Lighting
Living Room Renovation Ideas Using Lighting, Wall Colors, and Flooring
Small Room Flooring Ideas That Make Spaces Look Bigger

Flooring Ideas That Add Value: Best Floor Types for Every Room

How to Make Your Home Look Expensive Using Paint Colors and Wall Finishes

Wall Design Mistakes That Make Homes Look Cheap (And How to Avoid Them)

Interior Wall Color Trends for 2026 That Change How a Room Feels

Bedroom Lighting Ideas That Instantly Make the Room Feel Calm and Expensive
Discover Our Calculators